
Template Customisation
The email template editor lets you customise all 6 transactional email templates from within the WordPress admin. Edit subject lines and HTML bodies, insert variables with a single click, preview rendered output in an iframe, and send test emails — all without touching code.
Accessing the Editor
Navigate to LicenceForge > Email Templates in the WordPress admin sidebar. This opens the template editor page.
The email template editor is available to users with the manage_options capability (administrators by default).
Editor Layout
The editor page is divided into several areas:
Template Selector Sidebar
The left sidebar lists all 6 available templates:
- License Created
- Trial Created
- License Expiring
- License Renewed
- License Key Rotated
- License Suspended
Click any template name to load it into the editor. The currently selected template is highlighted in the sidebar.
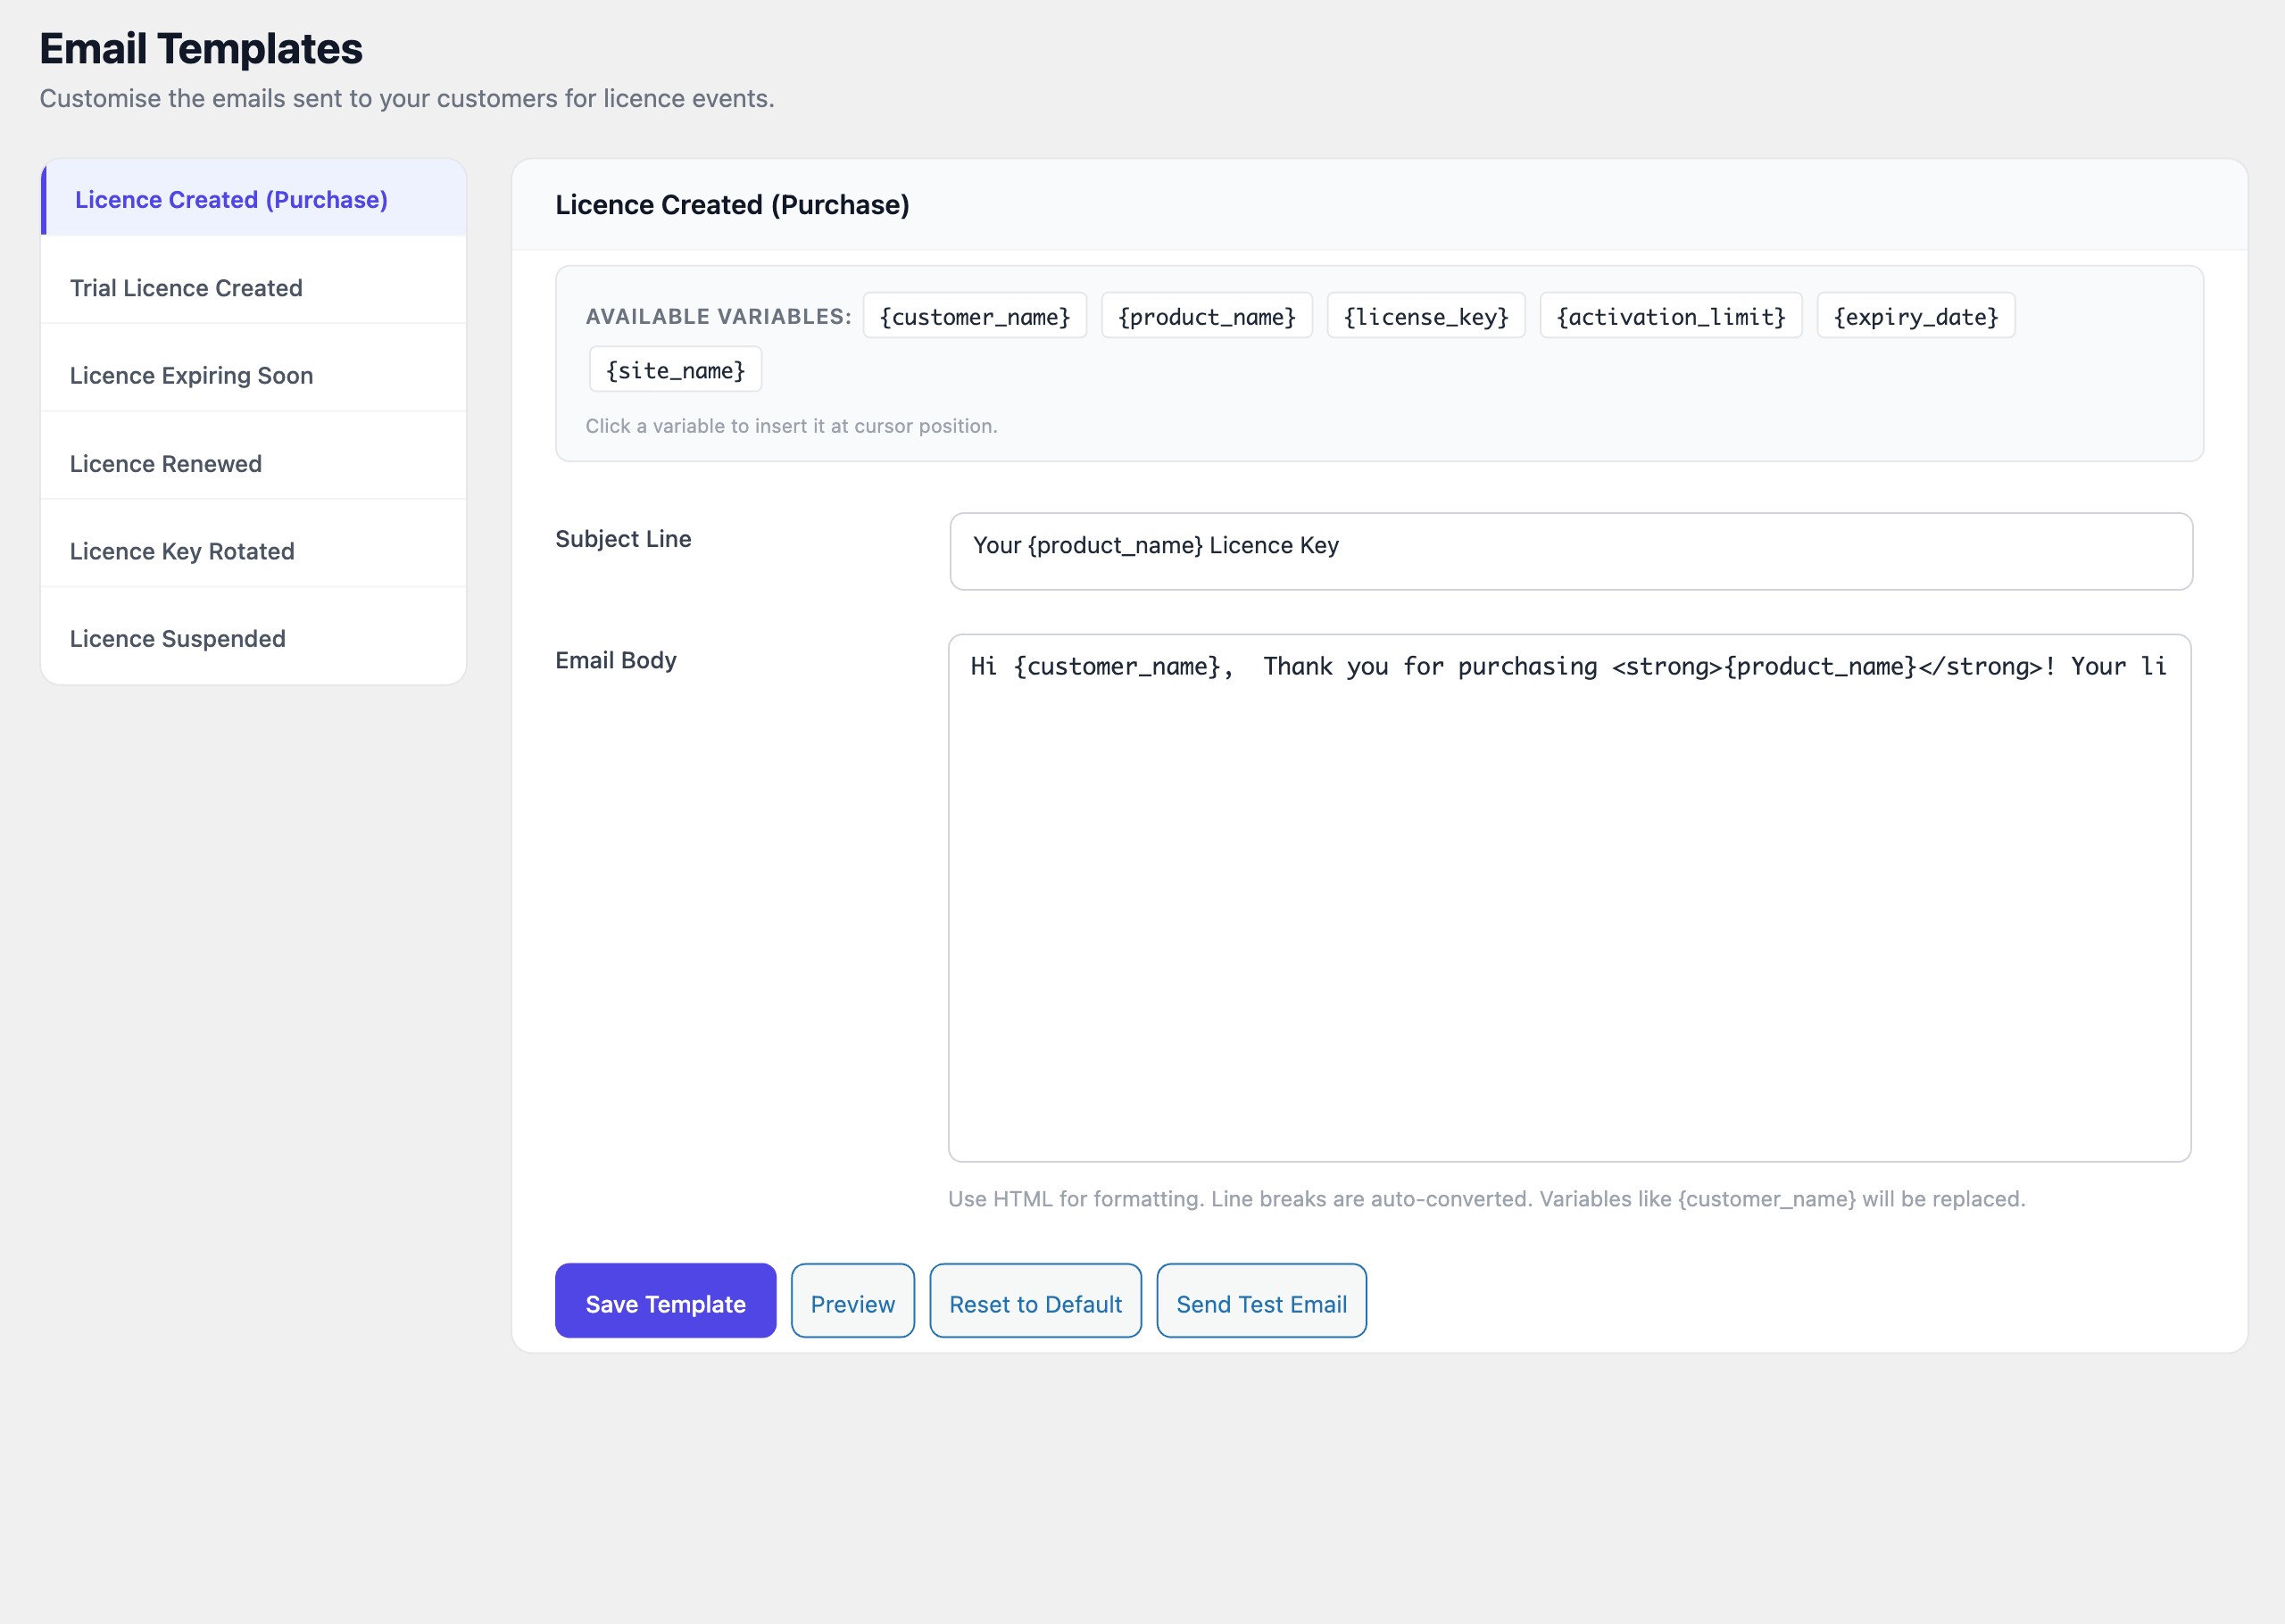
Subject Field
A single-line text input for the email subject. Variables can be used in the subject line and will be substituted at send time. For example:
Your {product_name} license keyBody Textarea
A multi-line textarea for the email body. The body supports full HTML, so you can include headings, paragraphs, lists, links, images, and inline styles. Variables are inserted using the same curly-brace syntax as the subject.
Email clients have limited CSS support. Use inline styles rather than <style> blocks, and test across major clients (Gmail, Outlook, Apple Mail) using the preview and test features described below.
Variable Insert Bar
Below the body textarea, the variable insert bar displays clickable buttons for every variable available in the currently selected template. Each button has a data-var attribute containing the variable code.
Clicking a variable button inserts the variable at the current cursor position in the body textarea. If the cursor is in the subject field, the variable is inserted there instead.
Example variable bar for license_created
The following variable buttons are shown when editing the license_created template:
| Button Label | data-var Value |
|---|---|
| Customer Name | {customer_name} |
| Product Name | {product_name} |
| License Key | {license_key} |
| Activation Limit | {activation_limit} |
| Expiry Date | {expiry_date} |
| Site Name | {site_name} |
The bar always includes the global variables ({site_name}, {site_url}, {brand_name}, {support_url}) in addition to the template-specific variables.
Editor Actions
Four action buttons are available at the bottom of the editor:
Save Template
Saves the current subject and body to the database. The template is stored as a WordPress option under the key wplf_email_template_{slug}. A success notice is displayed after saving.
Preview
Renders the current template with sample data and displays the result in an iframe set to 500px width. This gives an approximate view of how the email will appear in a typical email client. The preview substitutes all variables with placeholder values so you can verify the layout and content structure.
Reset to Default
Restores the selected template to its original default content. This replaces both the subject and body with the factory defaults that ship with LicenceForge. A confirmation dialog appears before the reset is applied.
Resetting a template discards all customisations for that template. If you want to preserve your current version, copy the subject and body to a safe location before resetting.
Send Test Email
Sends a test version of the currently loaded template to the site admin's email address. The test email uses the same sample data as the preview, so you can verify delivery, formatting, and spam-filter behaviour in a real inbox.
The test email is sent via wp_mail(). If you have an SMTP plugin configured, the test will use that delivery method, making it an effective way to verify your SMTP setup. See Email Configuration for SMTP details.
Recommended Workflow
- Select the template you want to edit from the sidebar.
- Modify the subject line and body content. Use the variable insert bar to add dynamic placeholders.
- Click Preview to review the rendered output in the iframe.
- Click Send Test Email to verify delivery and formatting in a real email client.
- Once satisfied, click Save Template to persist your changes.
Writing HTML Email Bodies
The body textarea accepts raw HTML. Keep the following guidelines in mind:
- Use table-based layouts for maximum cross-client compatibility.
- Apply styles inline with the
styleattribute rather than using<style>tags. - Avoid JavaScript — it is stripped or ignored by all major email clients.
- Use absolute URLs for images (e.g.,
https://example.com/logo.png), not relative paths. - Test in multiple email clients using the Send Test Email feature.
Example body snippet
<h2>Welcome, {customer_name}!</h2>
<p>Thank you for purchasing <strong>{product_name}</strong>.</p>
<p>Your license key:</p>
<pre style="background:#f4f4f4;padding:12px;font-size:16px;">{license_key}</pre>
<p>Activation limit: {activation_limit} sites<br>
Expires: {expiry_date}</p>
<p>If you need help, visit
<a href="{support_url}">{brand_name} Support</a>.</p>